
Hellasure (18+ Interactive Succubus Game)
HELLASURE - DEVLOG #4
Let's continue from where we left off in the main menu. What an endless main menu, right?
We've come to the 4th devlog and we're still talking about the main menu.
I wasn't joking when I said the main menu took more than 1.5 months. Let's get started!
a) Main Menu Button Animations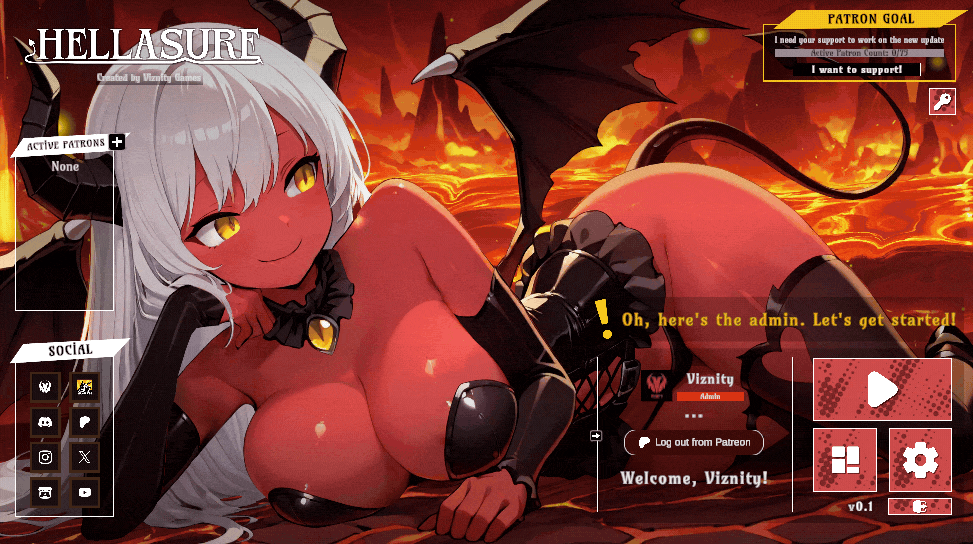
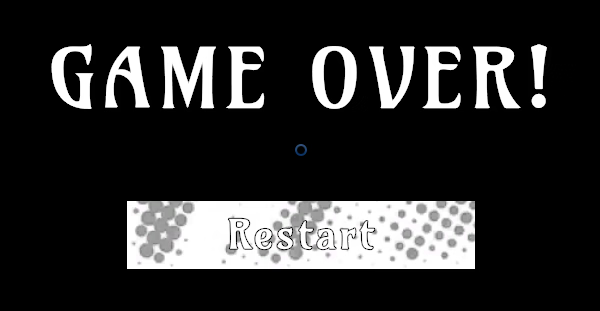
All the square buttons you see there are actually derived from a single button (in Unity we call this a Prefab). And its original color in the editor is white. It's a completely custom button. The reason it's designed in white is so I can override this color with the editor or script and change the icons inside as I like.
This same button also supports text. On screens like Game Over, I can use the text version of the same button like a "Restart button" example.
Besides this button, I also designed other buttons. I use them in some parts of the game (for example, the Patreon Login button has a different design).
b) Panels - Play (New Game & Load Previous Save)
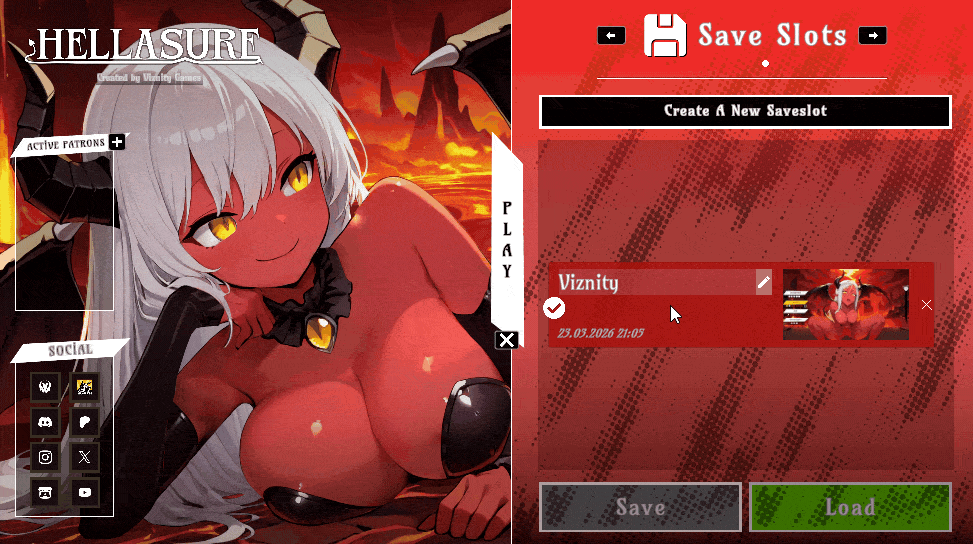
The panel opens with an animation from right to left. When closing, it disappears by moving in the opposite direction (to the left).
I specifically designed the panel to cover half of the screen. This way, when you start a new game or work with settings, you'll be able to clearly see Mira's face and continue interacting with her if you wish.
Many things are happening on this panel alone. Let's explain them one by one.
Normally, in games you see two separate buttons labeled "New Game" (creates a new save) and "Load Game" (loads existing save) This is quite normal. But instead of two buttons, I combined these two into a single panel for a more compact design.
When you first open it, you'll see the message "No Saved Games Found".
If you don't have any saves, you can create a new save by clicking the "Create a New Saveslot" button at the top.
If you have a saved game, your save file will appear in the list, as you can see in the GIF preview.
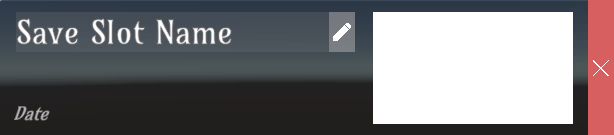
- Newly created saves are automatically named "New Save".
(You can change the name instantly by pressing the "Edit" button.)
- A small screenshot preview of the save is automatically displayed.
- The date of the save is also shown.
- To delete the save slot, you can press the rightmost "X" button.
(I've added a 2-second hold-down requirement to prevent accidental clicks).
The save system is entirely my own creation and is compatible with various third-party plugins I use.
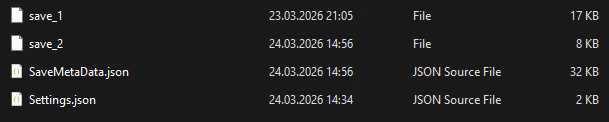
Each resulting save slot is named save_1, save_2, save_3, and so on...
(Your custom save name is stored as a value within these files).
I didn't intentionally encrypt the save file. It saves in a human-readable format as JSON (text), so you can edit it if you want. Because it saves in horizontal format, it might be a little difficult to read, but a normal user wouldn't need to edit the save file anyway.
Encrypted (compressed) save files help reduce file size. Even though my save files aren't encrypted (compressed), they're only a few kilobytes. The save file size is just a few kilobytes! (:
Optimization: The game doesn't save values from scenes you haven't yet encountered, so the save file is quite small at the beginning of the game. As you unlock new areas, characters, and scenes, the file size may increase slightly, but you can be sure it will still be only a few kilobytes.
The game has an automatic save system. It automatically saves before important scenes.
If you still want to save manually, you can use the F5 (Quick Save) and F9 (Quick Load) keys. It will overwrite your existing save file.
Note: For security reasons, I have restricted saving in certain specific locations. For example, you cannot save on the Game Over screen or when playing minigames. I am trying to prevent situations that might freeze the game or cause bugs as I become aware of them.
b) Panels - Settings
I continued to work in a compact way for the settings screen as well.
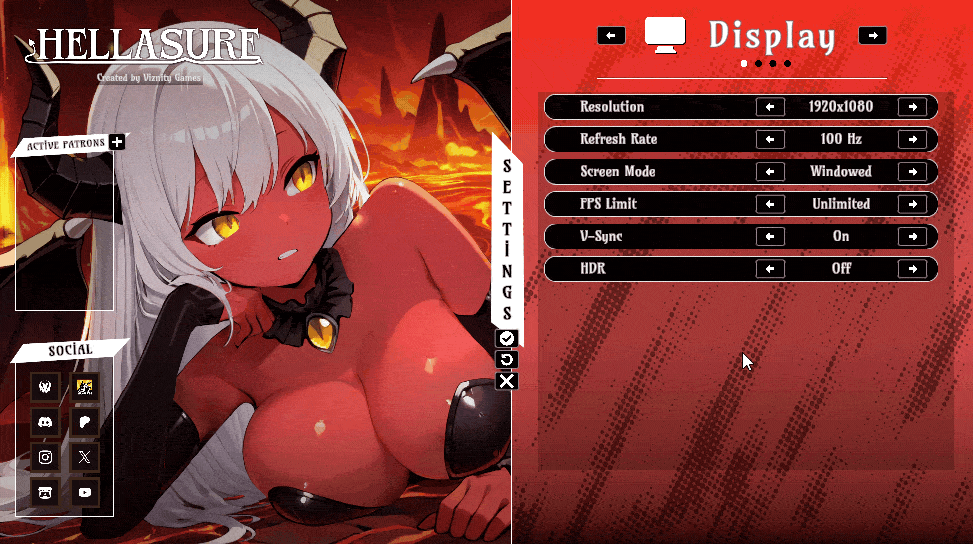
At the top, you'll find the "Display", "Graphics", "Audio" and "Language" pages, in that order.
Since the game is 2D, there aren't dozens of different options like you're used to from 3D games because they're unnecessary. I only included settings that affect your screen and the gameplay itself. Therefore, adding just four settings to the graphics settings was enough. These are: Shadow Quality, Texture Quality, Anti-aliasing, and Anisotropic Filtering.
The Unity game engine didn't support "Borderless Windowed" and "Borderless Fullscreen" window mode settings by default. I wrote a custom script for this and included it in my game.
I enable VSync by default when starting the game, and it locks FPS to your monitor's refresh rate (Hz). While disabling this setting might be beneficial in 3D games, my game is 2D and quite light, so it can easily reach 2000-3000 FPS in the main menu, and there's no need for your graphics card to work at full performance unnecessarily (But of course, players who wish to can turn this setting off).
I'm normally experienced with third-party upscaler technologies (DLSS, FSR, and XeSS). However, since it's a 2D game and you can already achieve thousands of FPS, I didn't feel the need to add those settings.
The game's settings load with defaults when you first launch it. Some settings are initially configured specifically for your computer (for example, your default resolution, refresh rate, and system language). Afterwards, you can change and save the desired setting from the Settings menu.
I've separated the settings save file. It's saved as Settings.json.
And since I used Pretty JSON, you can change the values by editing the file.
Settings.json (example):
{ "OptionPicker_AnisotropicFiltering": 1.0, // [Min: 0, Max: 2] Anisotropic Filtering "OptionPicker_AntiAliasing": 5.0, // [Min: 0, Max: 5] Anti Aliasing "OptionPicker_DialogueLanguage": 0.0, "OptionPicker_FoliageQuality": 5.0, "OptionPicker_FPSLimit": 6.0, // [Min: 0, Max: 6] FPS Limit "OptionPicker_GlobalIlluminationQuality": 5.0, "OptionPicker_HDR": 0.0, // [Min: 0, Max: 1] HDR "OptionPicker_Language": 0.0, // [Min: 0, Max: 4] Language "OptionPicker_MasterVolume": 20.0, // [Min: 0, Max: 20] Master Volume "OptionPicker_MusicVolume": 20.0, // [Min: 0, Max: 20] Music Volume "OptionPicker_PostProcessQuality": 5.0, "OptionPicker_ReflectionQuality": 5.0, "OptionPicker_RefreshRate": 2.0, // [Min: 0, Max: 0] Refresh Rate "OptionPicker_Resolution": 21.0, // [Min: 0, Max: 26] Resolution "OptionPicker_ScreenMode": 3.0, // [Min: 0, Max: 3] Screen Mode "OptionPicker_SFXVolume": 20.0, // [Min: 0, Max: 20] SFX Volume "OptionPicker_ShadingQuality": 5.0, "OptionPicker_ShadowQuality": 5.0, // [Min: 0, Max: 5] Shadow Quality "OptionPicker_Subtitles": 1.0, // [Min: 0, Max: 1] 0=Off, 1=On "OptionPicker_TextureQuality": 5.0, // [Min: 0, Max: 5] Texture Quality "OptionPicker_ViewDistanceQuality": 5.0, "OptionPicker_VoiceVolume": 20.0, // [Min: 0, Max: 20] Voice Volume "OptionPicker_VSync": 1.0 // [Min: 0, Max: 1] V-Sync }
I've added metadata next to them (// comments). If you want to edit the settings externally, knowing the minimum and maximum values will help you avoid entering incorrect values.
Save Directory: C:\Users\YOURUSERNAME\AppData\LocalLow\Viznity Games\Hellasure
I went a step further in this section. And guess what? I implemented something that even modern games don't have (at least not that I know of :D): reading & applying changes from the save file on disk while application is running.
So what does this do?
Changes you make in the Settings.json file are instantly read without needing to restart the game, and the settings are applied if the game is running.
Scripts:

My save system doesn't have a limit on the number of save files you can create. As you know, some games restrict this. There can be several reasons for this restriction. The most common reason is to avoid overloading the server disks of cloud-supporting platforms (Steam, PlayStation, etc.). Since I haven't yet planned to release my game on these platforms, I haven't felt the need for a restriction (besides, with save files only a few kilobytes in size, even if you create thousands of saves, you'll only reach about 1 MB of disk space, so everything is fine! The system works perfectly.)
PS: Since I have my own server, I considered creating a dedicated cloud-save system for my Patreon users. However, writing the Patreon login system already took months, so designing a truly flawless and error-free cloud save system would have taken up even more of my time. Plus, it would have added to the disk space costs on the server side. So, for now, I've put that idea on hold, thinking "I'll do it later if I find the time," and continued developing the game.
c) Panels - Gallery
Okay, now let's move on to the gallery system (WIP).
In my previous game, Rick's Lewd Universe, I created a basic gallery system (5 years ago), so I had some experience. But it's incomparable to the advanced gallery system I'm about to show you. Here, I've pushed the boundaries once again.
The design may change in the future, it's still under construction. But let me tell you a little about its current state.
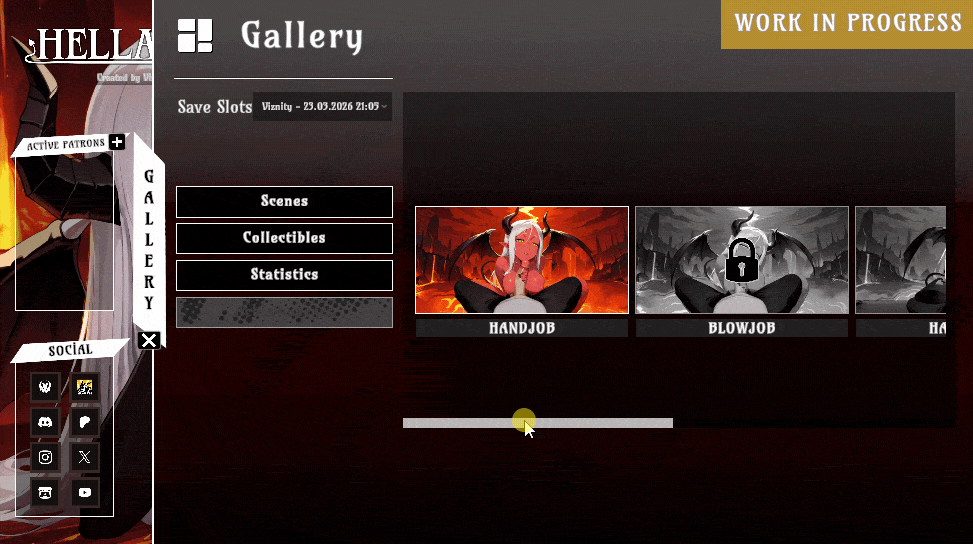
It supports a multi-save slot system.
[ ] You select your current save from the top left, and you'll see unlocked scenes, collectibles, and other elements specific to that save.
In the Scenes section, you'll find the H-scenes you've previously unlocked. Clicking on them will load the scene, allowing you to replay it repeatedly.
In the Collections section, certain visuals unlock specifically when you progress through the dialogue branch in the game. While fast players might miss these, users who want to unlock all the dialogues are rewarded with a collectible card.
[ ] When you click on a card, a full-screen image is displayed. These cards are relevant to the content of the previous conversation or quest (for example, if you asked Mira about bathing, this could unlock a collectible card for Mira to take a bath with). The HUD will display "Collectibles Unlocked!" in-game.
[ ] For now, you need to return to the main menu and open the Gallery to access the collection. However, I may implement this in-game in the future.
In the Statistics section, your total number of games played, playing time, and number of actions are displayed.
[ ] For users who have logged in with Patreon, these stats are saved and continue from where they left off the next time they log in. Unlike in-game saves, these statistics are linked to your Patreon account and saved to your account (I'm thinking of creating a section in the future to display game statistics for users who log in to the Viznity Games Platform).
In the Achievements section (currently not available), there will be in-game achievements, and just like in the Stats section, they will be saved to your account.
[ ] However, this hasn't started yet and I'll be delaying it for a while.
c) Panels - Quit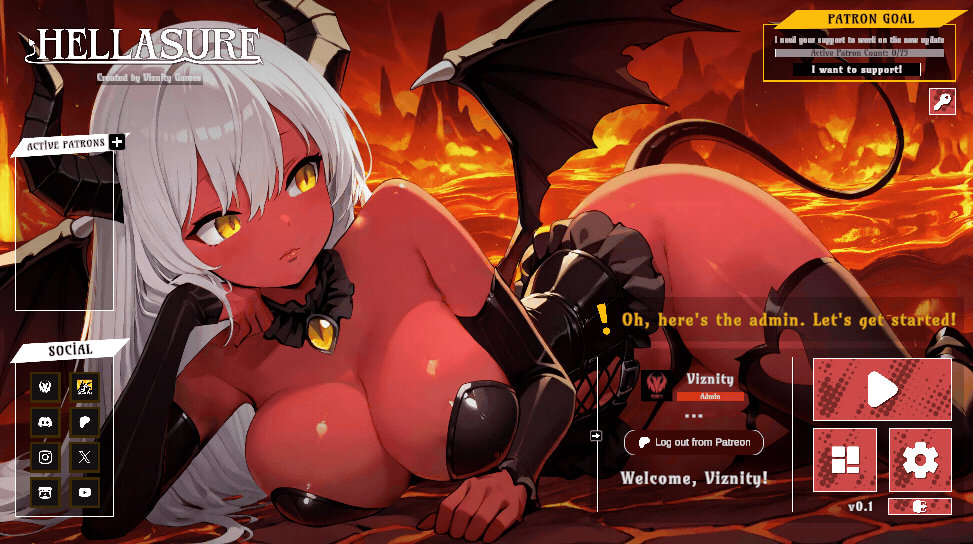
Pressing the Quit button opens the Universal Modal screen, which is accessible from anywhere.
It can be turned on and off using the ESC keyboard key.
[ ] In-game, the same panel changes to "Game Paused" if the ESC key is pressed.
--
End of the devlog #4! I hope you enjoyed reading it.
To stay updated, here's the Patreon link!
See you in the next devlog!
Leave a comment
Log in with itch.io to leave a comment.